“Cupping Therapy at Home: A Step-by-Step Guide to DIY Healing”
Cupping therapy, an ancient practice with roots in traditional Chinese medicine, is gaining popularity as individuals seek natural and holistic approaches to health and well-being. Traditionally administered by trained practitioners, cupping therapy is now being explored by many as a self-care regimen that can be practiced in the comfort of one’s own home. In this comprehensive guide, we will explore the world of cupping therapy, offering step-by-step instructions on how to perform it at home, essential tips, precautions, and the potential benefits. By the end of this article, you’ll be well-prepared to embark on your own cupping therapy journey, promoting relaxation and overall wellness.
I. The Basics of Cupping Therapy
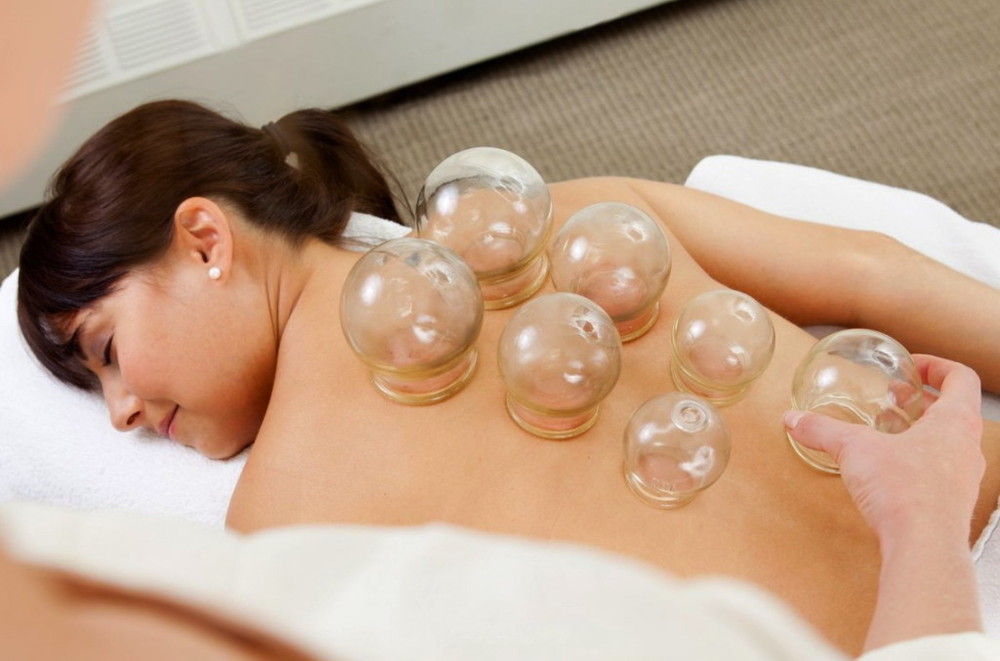
Cupping therapy involves placing cups on the skin to create suction, which is believed to have several therapeutic benefits, including improved blood circulation, reduced muscle tension, and relaxation. Understanding the fundamentals of cupping is essential before attempting it at home.
II. Materials and Tools for Home Cupping
Before diving into home cupping, it’s crucial to gather the necessary materials and tools. You’ll need cups, oil or lotion, and alcohol for a safe and effective session. Choosing the right supplies is a critical first step.
III. Preparing for Your Home Cupping Session
Materials you will need:
Cups: You can use silicone, glass, or plastic cups specifically designed for cupping therapy. Silicone cups with a squeeze bulb or vacuum pump are user-friendly for home use.
Oil or lotion: To create a smooth surface for the cups to glide over your skin.
Alcohol: To clean the cups and your skin.
Procedure:
Prepare the area: Choose a clean, quiet, and well-lit space for your cupping session. Ensure that you have easy access to the area of your body you want to treat, such as your back, shoulders, or legs.
Clean your skin: Wash and thoroughly dry the area where you will apply the cups. You can also wipe it with alcohol to ensure it’s clean and free from oils or lotions.
Apply oil or lotion: Apply a thin layer of oil or lotion to the skin in the targeted area. This step helps the cups glide smoothly and prevents skin irritation.
Suction the cups:
a. Using silicone cups with a squeeze bulb:
Squeeze the bulb to create a vacuum inside the cup.
Quickly place the cup on the skin, making sure it adheres to the surface.
Release the bulb to maintain the suction.
b. Using cups with a vacuum pump:
Attach the vacuum pump to the cup.
Pump the device to create suction inside the cup.
Remove the pump, and the cup should remain in place due to the suction.
Cup placement: You can place multiple cups in a specific pattern or follow your preferred method. Make sure the cups are evenly spaced and securely attached to your skin.
Duration of the session: The duration of your cupping session can vary, but it’s typically recommended to start with 5-10 minutes for beginners. You can gradually increase the time as you become more accustomed to the therapy.
Removing the cups: To remove the cups, gently press the skin near the edge of the cup to break the seal and release the suction. Never pull the cups off abruptly, as it can cause skin bruising or irritation.
Post-cupping care: After the session, you may notice round, reddish marks on your skin. These are known as “cupping marks” and are a common outcome of the therapy. They usually fade within a few days. It’s essential to take care of your skin by applying a soothing lotion or oil and staying well-hydrated.
Safety considerations:
Avoid cupping over open wounds, irritated skin, or varicose veins.
Be cautious when using fire cupping, and always follow safety guidelines to prevent burns.
If you have any underlying medical conditions or concerns, consult with a healthcare professional before attempting cupping therapy at home.
Remember that cupping therapy may not be suitable for everyone, and it’s essential to exercise caution and follow proper hygiene and safety practices when performing it at home. If you are new to cupping or have any health concerns, consider seeking guidance from a qualified healthcare practitioner or licensed acupuncturist before beginning home cupping sessions.
VI. Safety Precautions: What to Watch Out For
Safety is paramount when performing cupping therapy at home. We discuss precautions to take and potential contraindications to ensure a safe and effective experience.
VII. Benefits of Home Cupping Therapy
Learn about the potential benefits of cupping therapy, such as pain relief, improved circulation, reduced stress, and detoxification.
VIII. Post-Cupping Care and Aftercare
Once your cupping session is complete, it’s crucial to know how to care for your skin and body afterward.
Cupping therapy, with its long history and potential wellness benefits, offers a unique approach to self-care and relaxation. This guide has equipped you with the knowledge and practical steps needed to safely and effectively practice cupping therapy at home. Remember that while cupping therapy can be a valuable addition to your wellness routine, it may not be suitable for everyone. If you are new to cupping or have underlying health concerns, it’s wise to seek guidance from a qualified healthcare professional or licensed practitioner before embarking on your home cupping journey. Enjoy the journey to improved well-being through the ancient art of cupping therapy.